This site is being phased out.
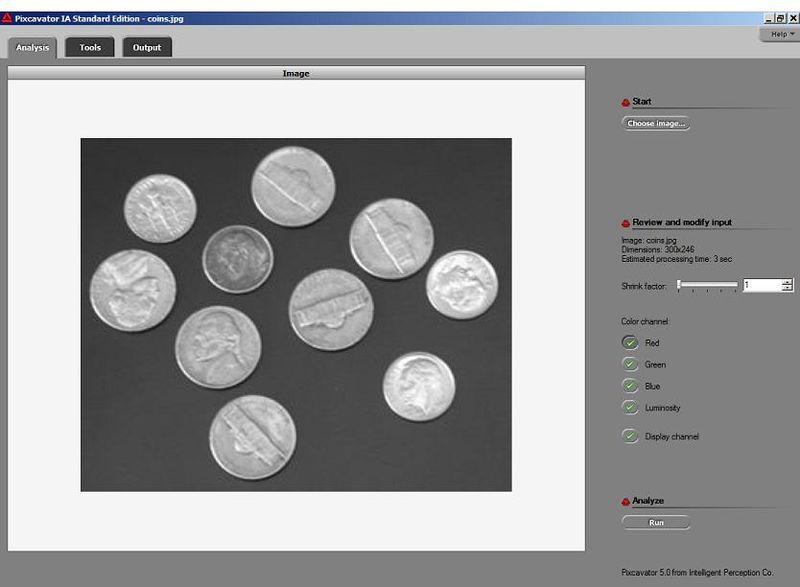
Analysis tab
Select an image file from your computer by using the Choose image… button on the right. The most popular formats are supported: JPEG, BMP, PNG, GIF, TIFF.
The image will appear in the window on the left.
You can pan it using the left button of your mouse. The right button provides you with a magnification tool.
Before you push Run to start processing there are a few factors to consider.
Analysis of large images will take longer. The processing time may be estimated by the formula:
40 * width of the image * height of the image / 1000,000 seconds.
This data is displayed on the right under Review and modify input. Simpler images take less time, complex more. It will take about 25 seconds to process a gray scale 512×512 image. See Processing time.
If you are interested mainly in image analysis (as opposed to image manipulation or enhancement), smaller details within the image may be of relatively low interest. If this is the case, consider shrinking the image.
Use the slider marked with Shrink factor. If you have chosen to shrink the image, the shrunken version is shown when you press Display channel.
It is important to remember that both dimensions of the image are reduced. Therefore, if the slider is set at m, each of the two the dimensions of the image will be shrunk by m. As a result the processing time will be reduced by m*m. For example, if you set the slider at 2, the processing time will be cut by a factor of 2*2=4.
For your convenience, this slider is preset so that the processing time is under 10 seconds. The use of this option is also appropriate for the initial analysis of a large image before you commit yourself to a long wait.
Keep in mind that once the image is shrunk, it is the new image that will be analyzed. Generally, this will not affect the number of objects detected as long as they are "large" and stay apart from each other. However, the sizes and locations of the objects will be displayed relative to the shrunk image. Another way of thinking about shrinking the image is as reducing image resolution.
For more on this and examples of how to deal with shrinking and stretching, see Image scaling.
There is another way to improve the processing speed. Using the Pixcavator's image processing tools to crop a small but important portion of the image and analyze it. This will remove the unwanted clutter in the image and will make the analysis more meaningful.
Before you start processing you can enhance and modify the image if you go to the Tools tab. With an improved quality of the image the analysis results will be better. However, keep in mind that while you remove noise, you may end up removing important features or change their measurements. That's why it's better to use these tools only as a last resort.
There are more options under Review and modify input. If this is a color image, at this point you also choose the color channel you want to analyze. Under Color channel click one of the four buttons. To preview the chosen channel, depress Display channel. Every color image has three color channels - red, green and blue - and the image features you are after may be more pronounced with respect to one of them. For more information see RGB channels and Color image analysis for examples.
The analysis starts when you push Run. Once it is finished, you are automatically taken to the Output tab. The actual processing time is shown when it's done, and a beep is produced - but only if processing has taken more than 5 seconds.
Note: when you open a new image, the output data from the previous analysis is discarded, but your choice of color channel is preserved.
